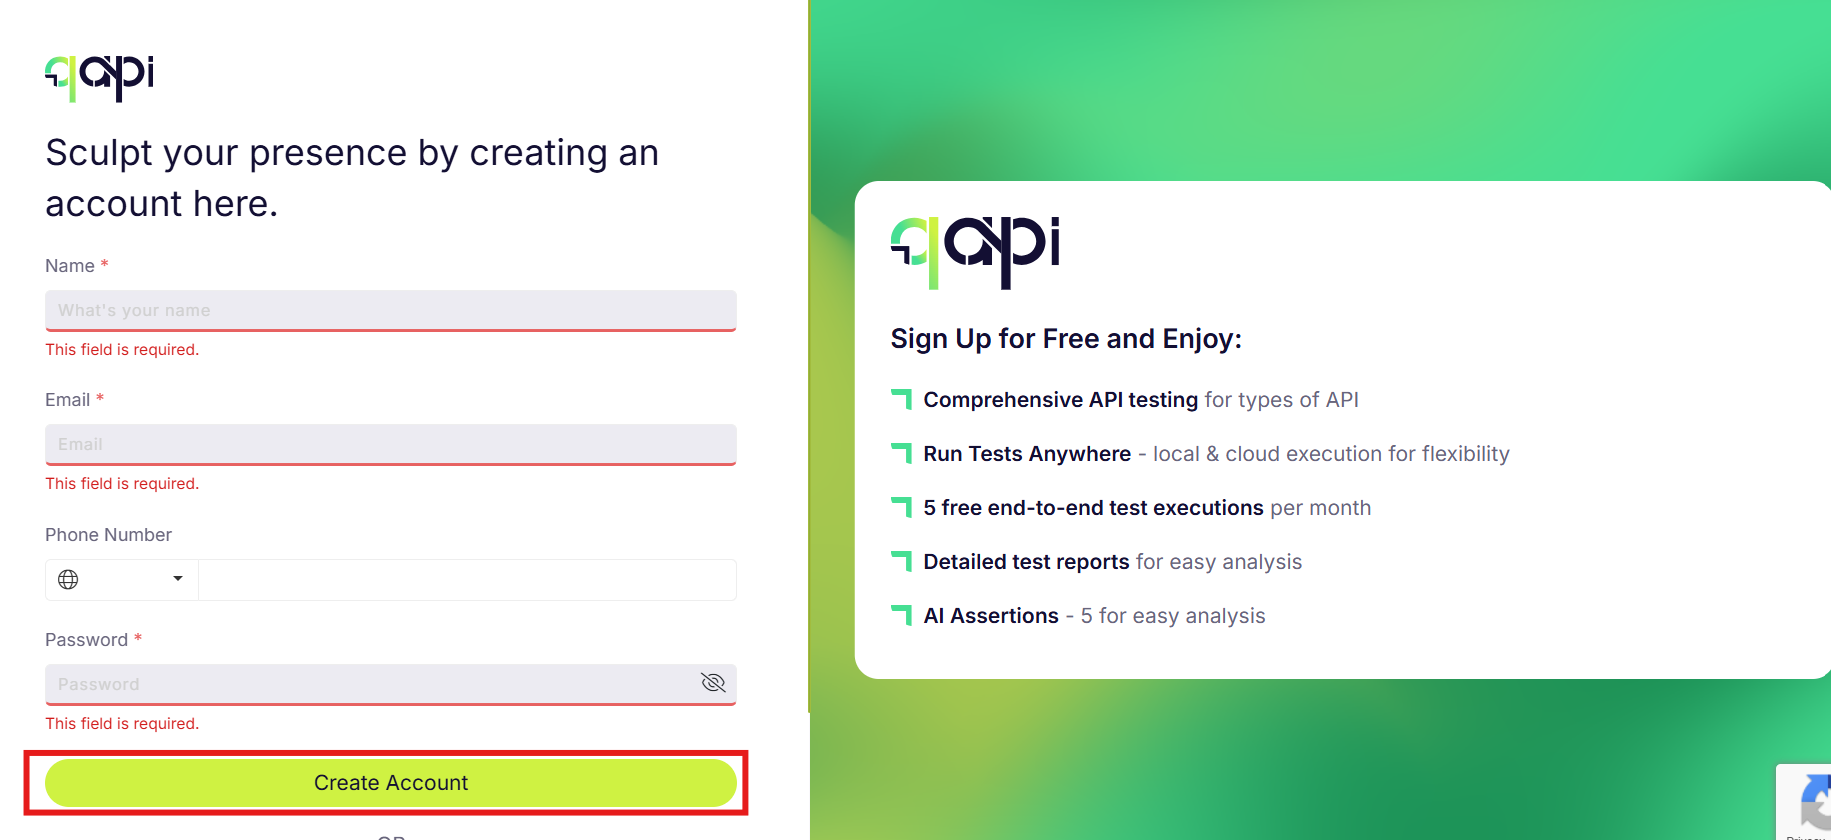
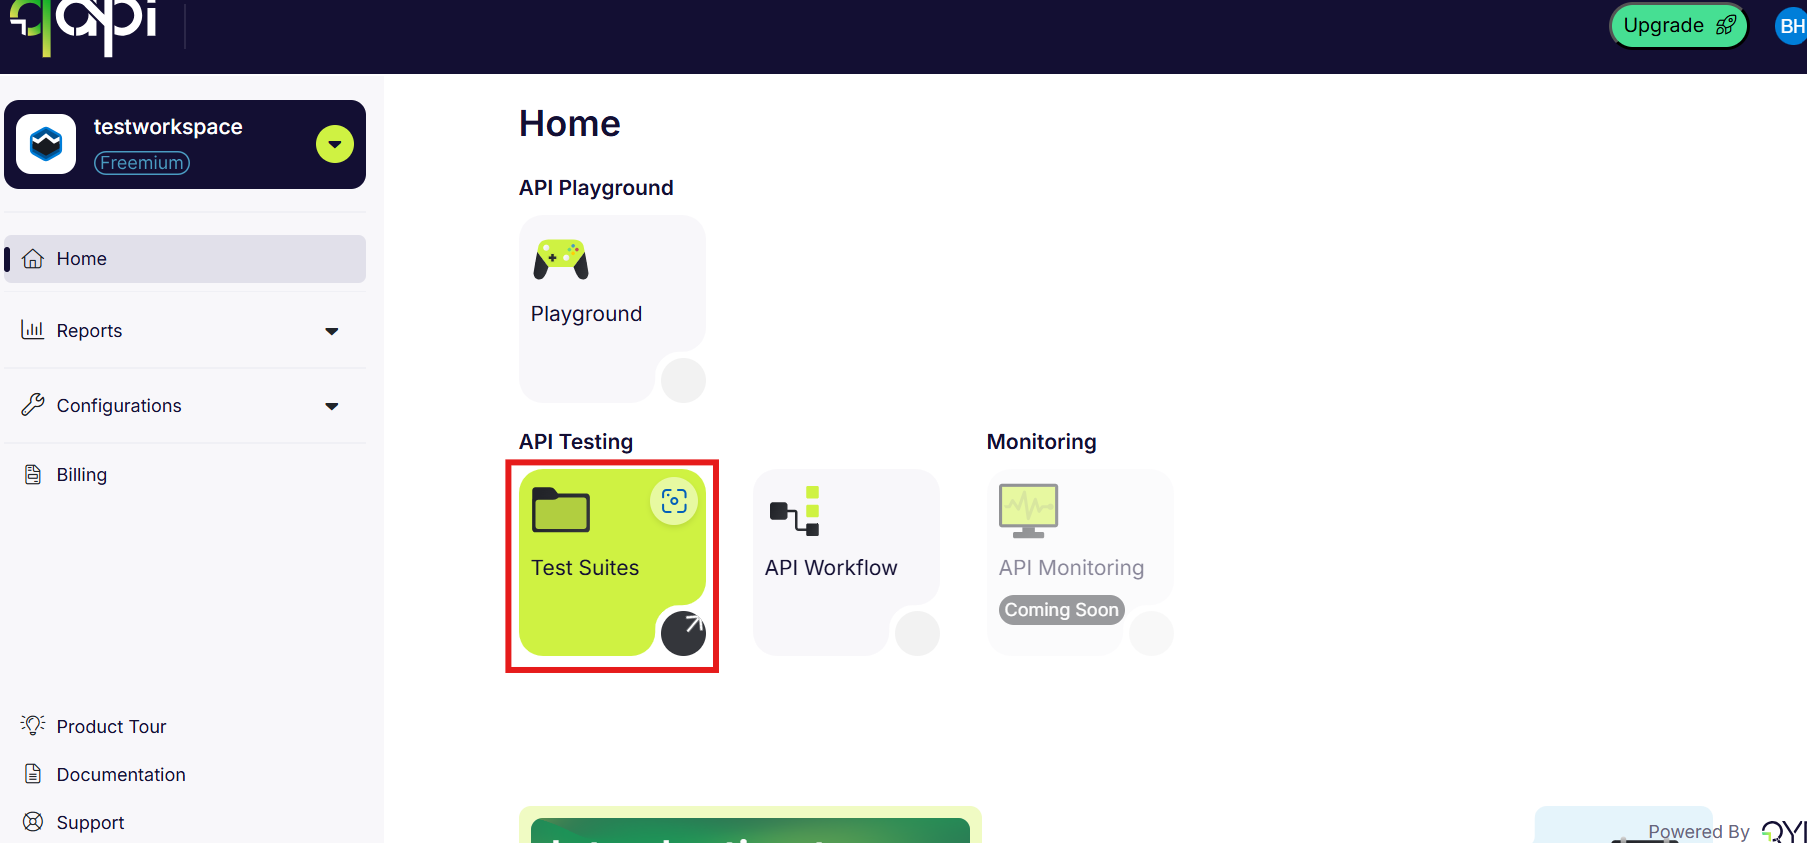
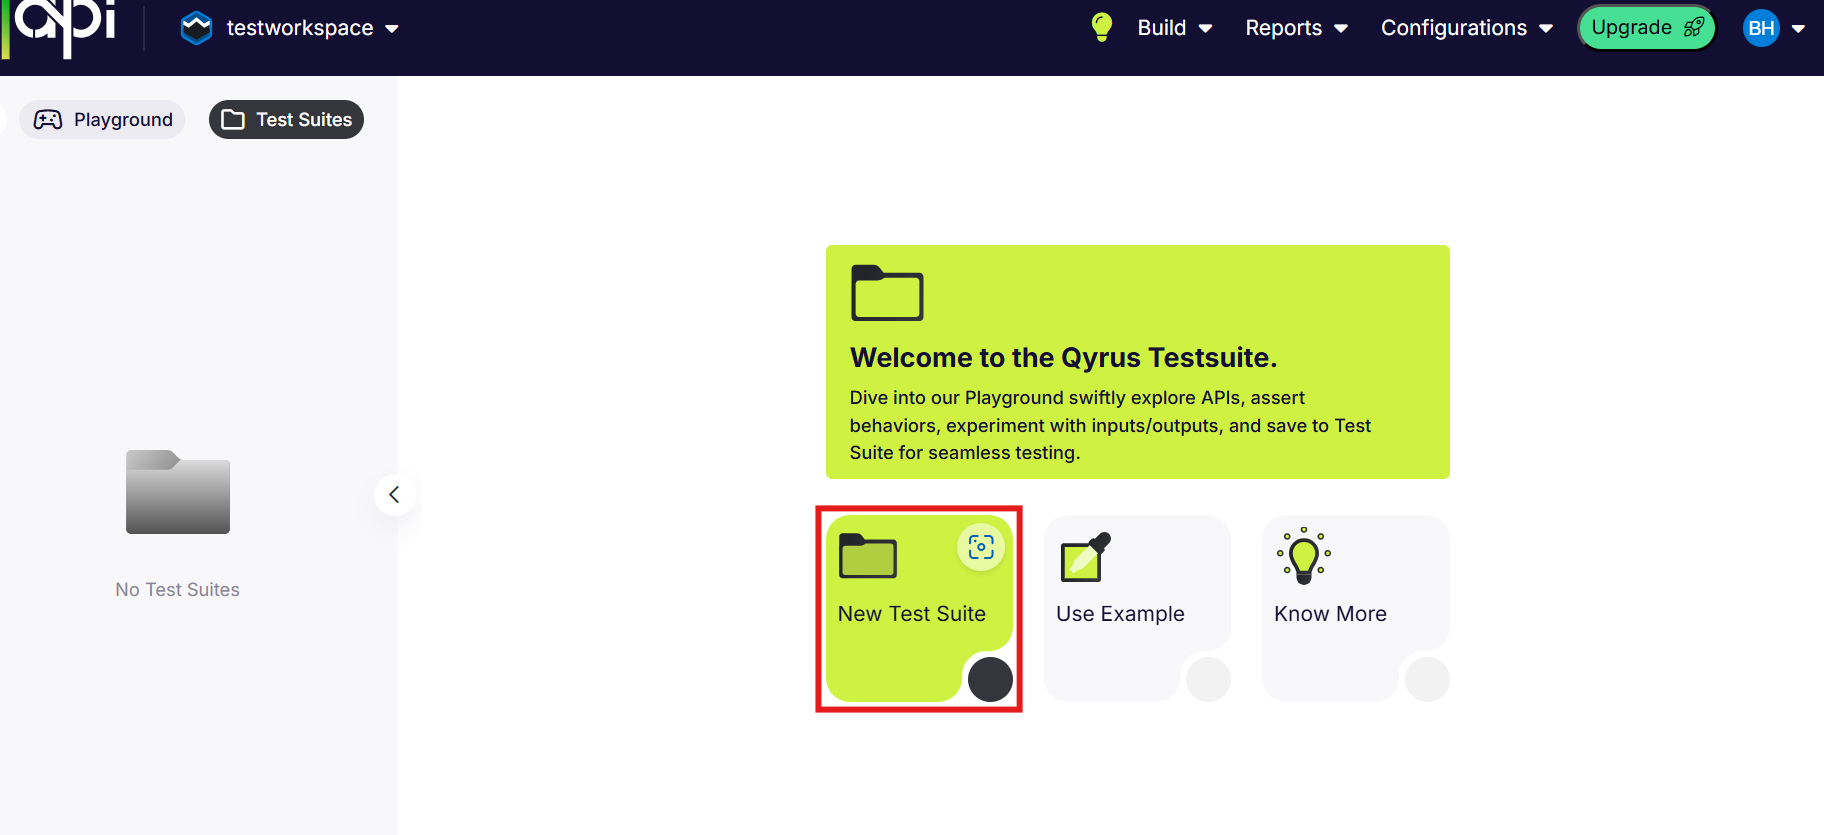
3. Navigate to the Test Suites section of your qAPI workspace.
4. Click on the "New Test Suite" button.
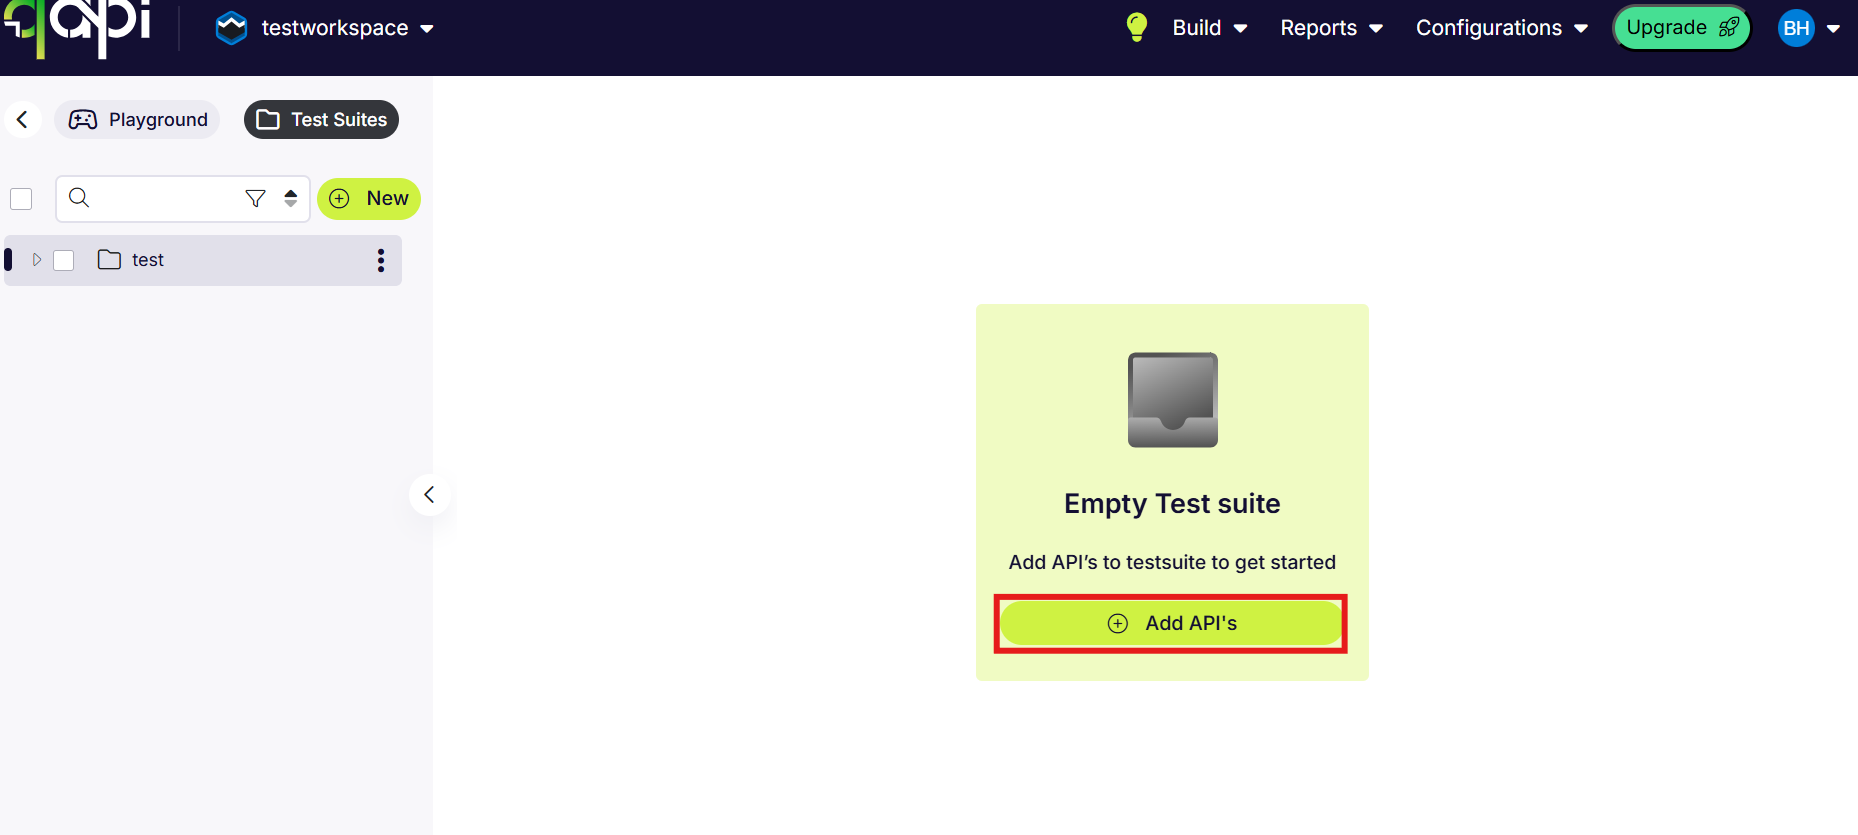
5. Click on "Add API" button.
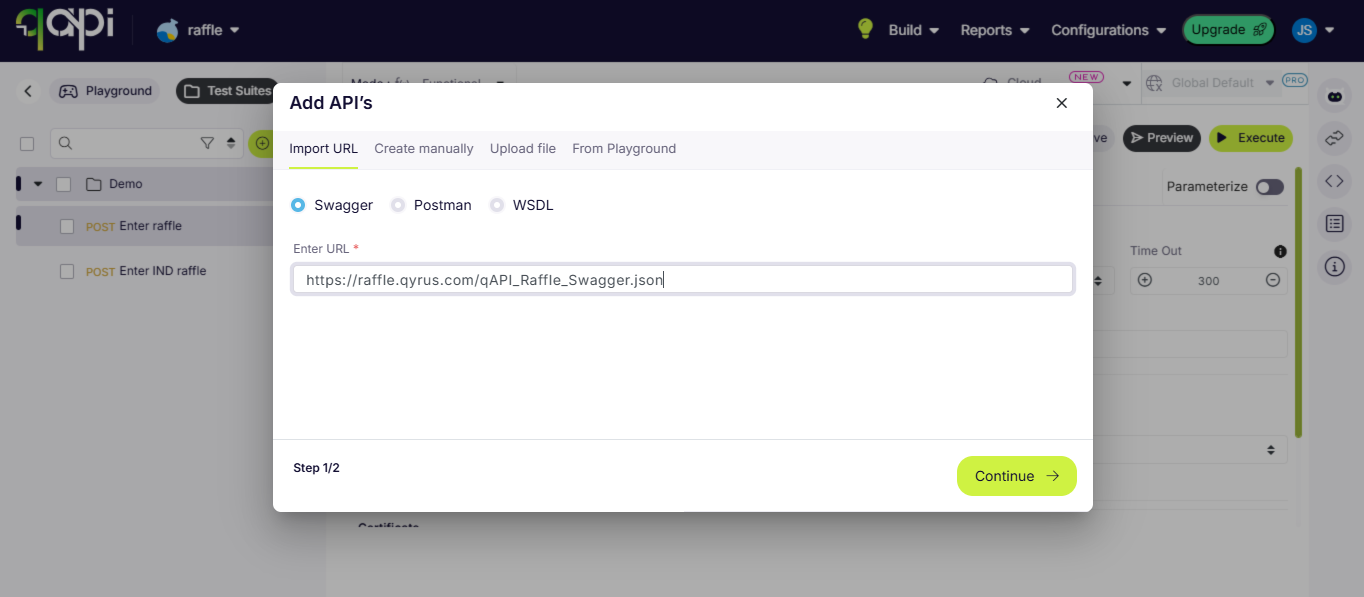
6. Enter the Swagger URL
(https://raffle.qyrus.com/qAPI_Raffle_Swagger.json
) in the "Import URL" tab with the Swagger option selected. OR Follow
the instructions
here to manually add the Raffle API using
the information provided in the JSON.
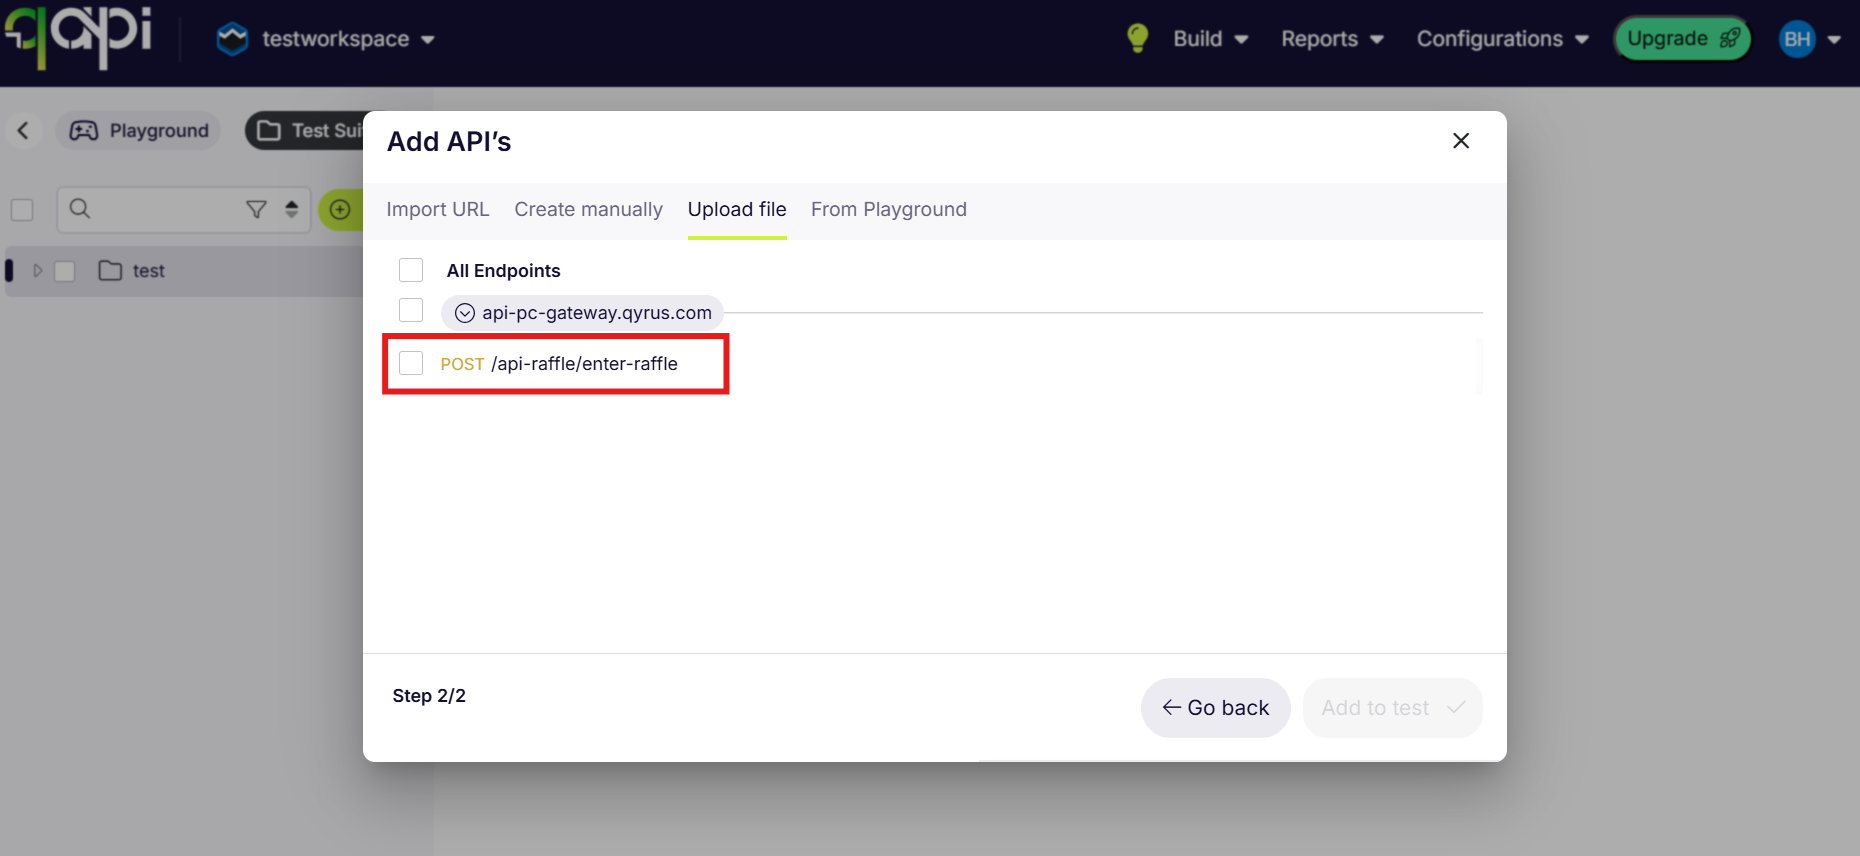
7. Click on the endpoints that you want to import.
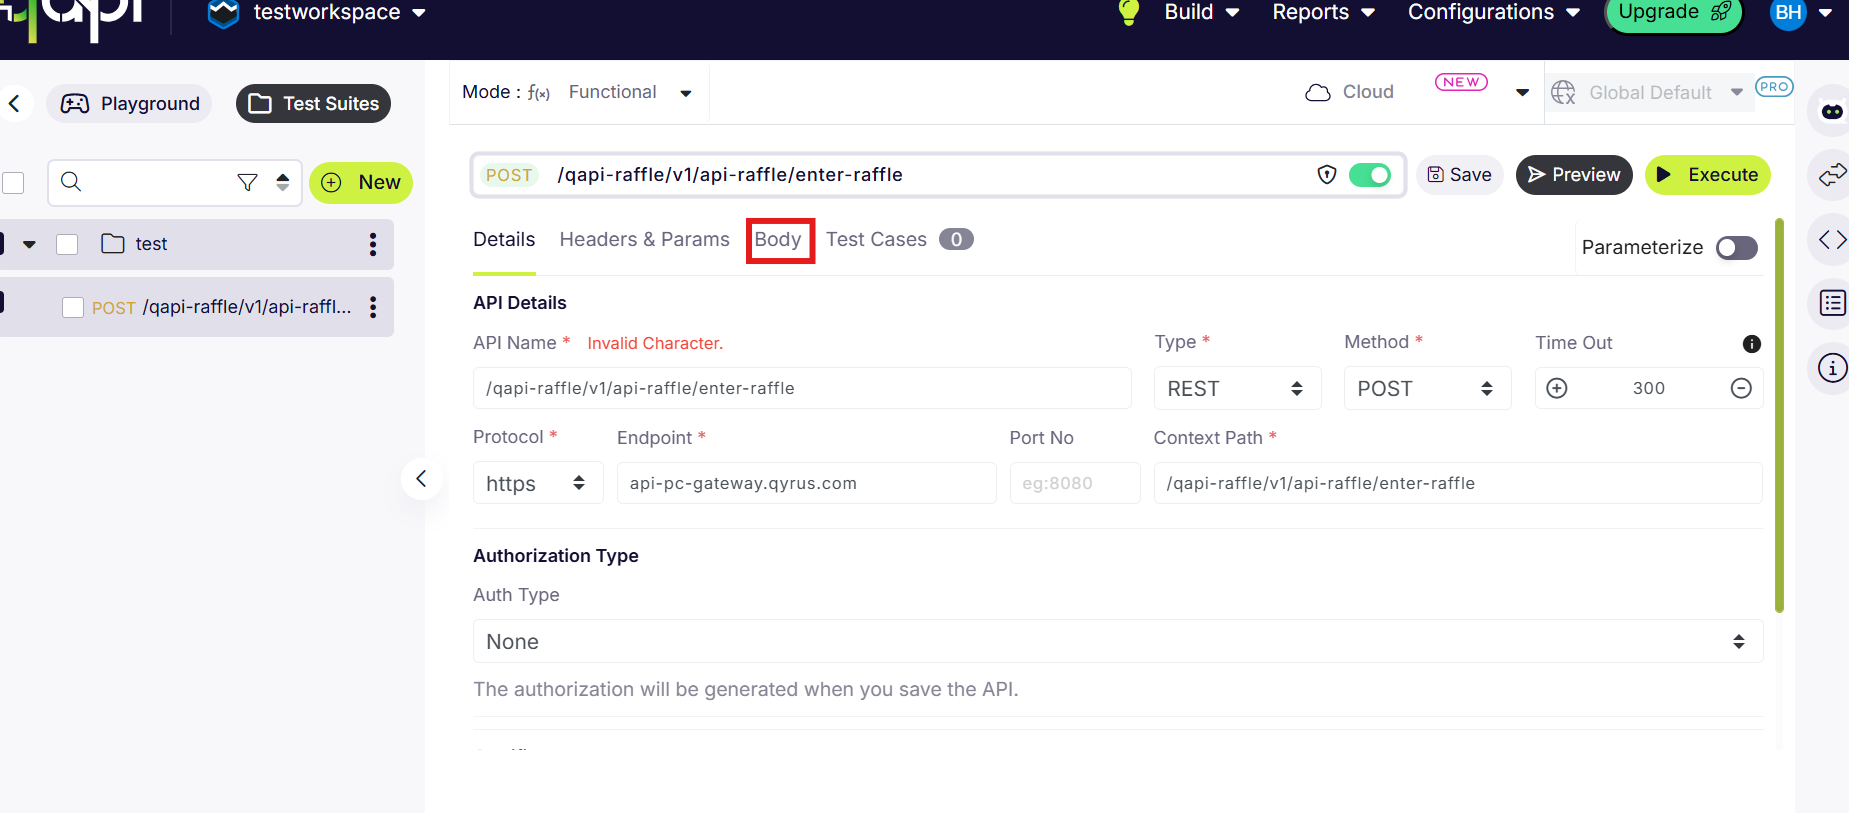
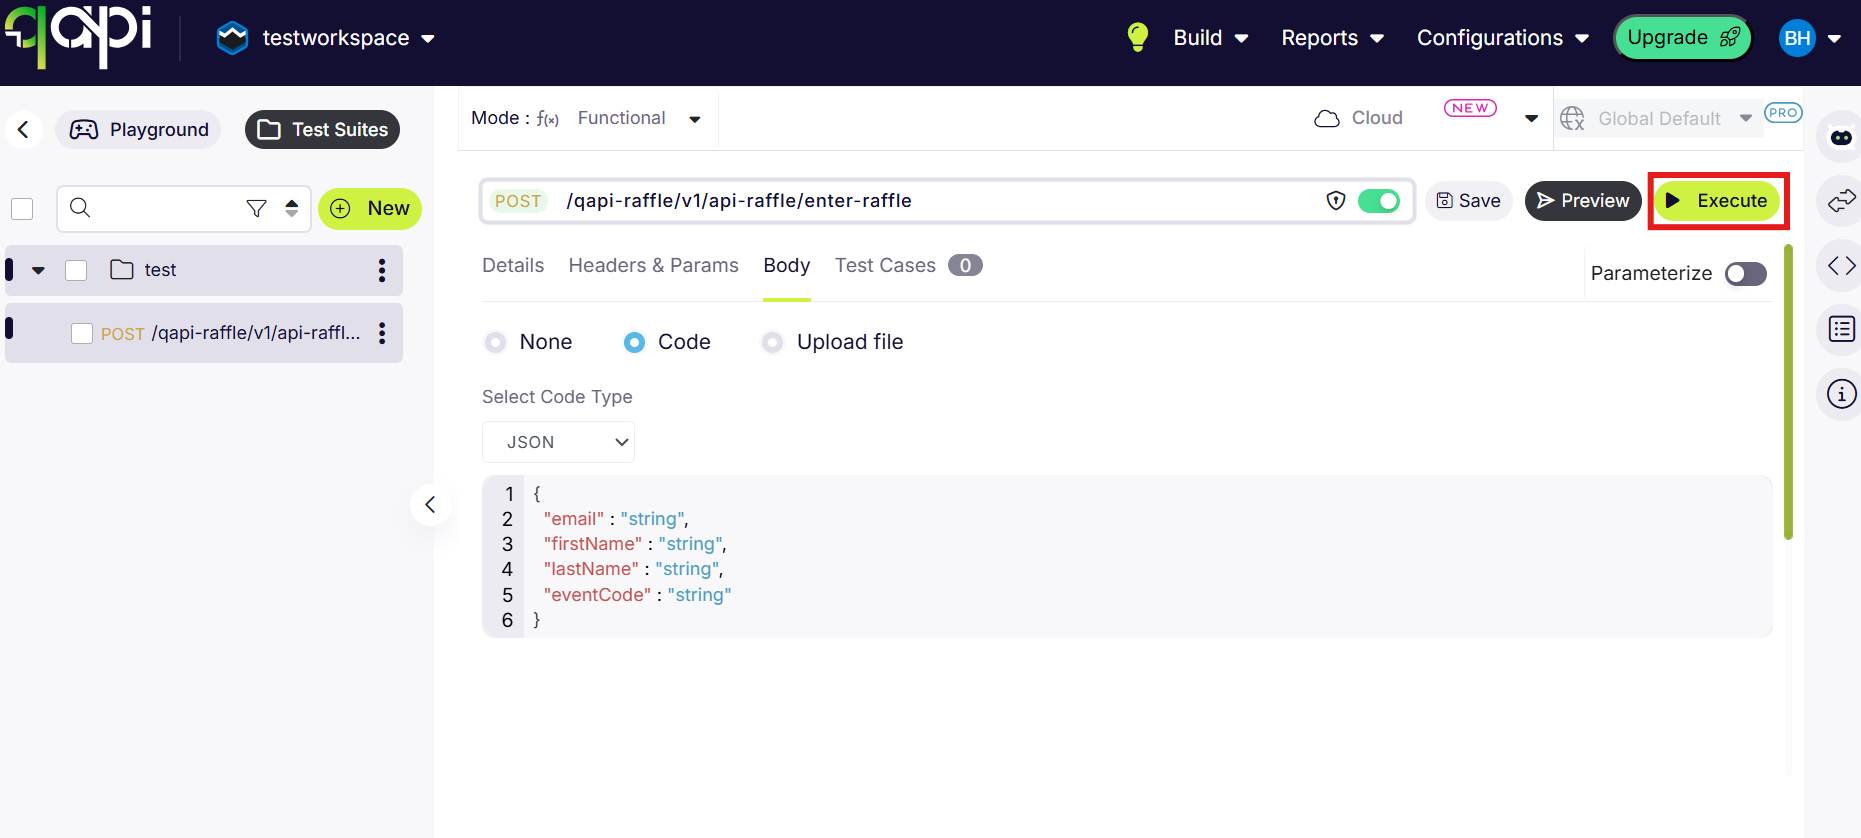
8. When the test has been successfully imported/created on qAPI navigate
to the "Body" section where the information fields are stored.
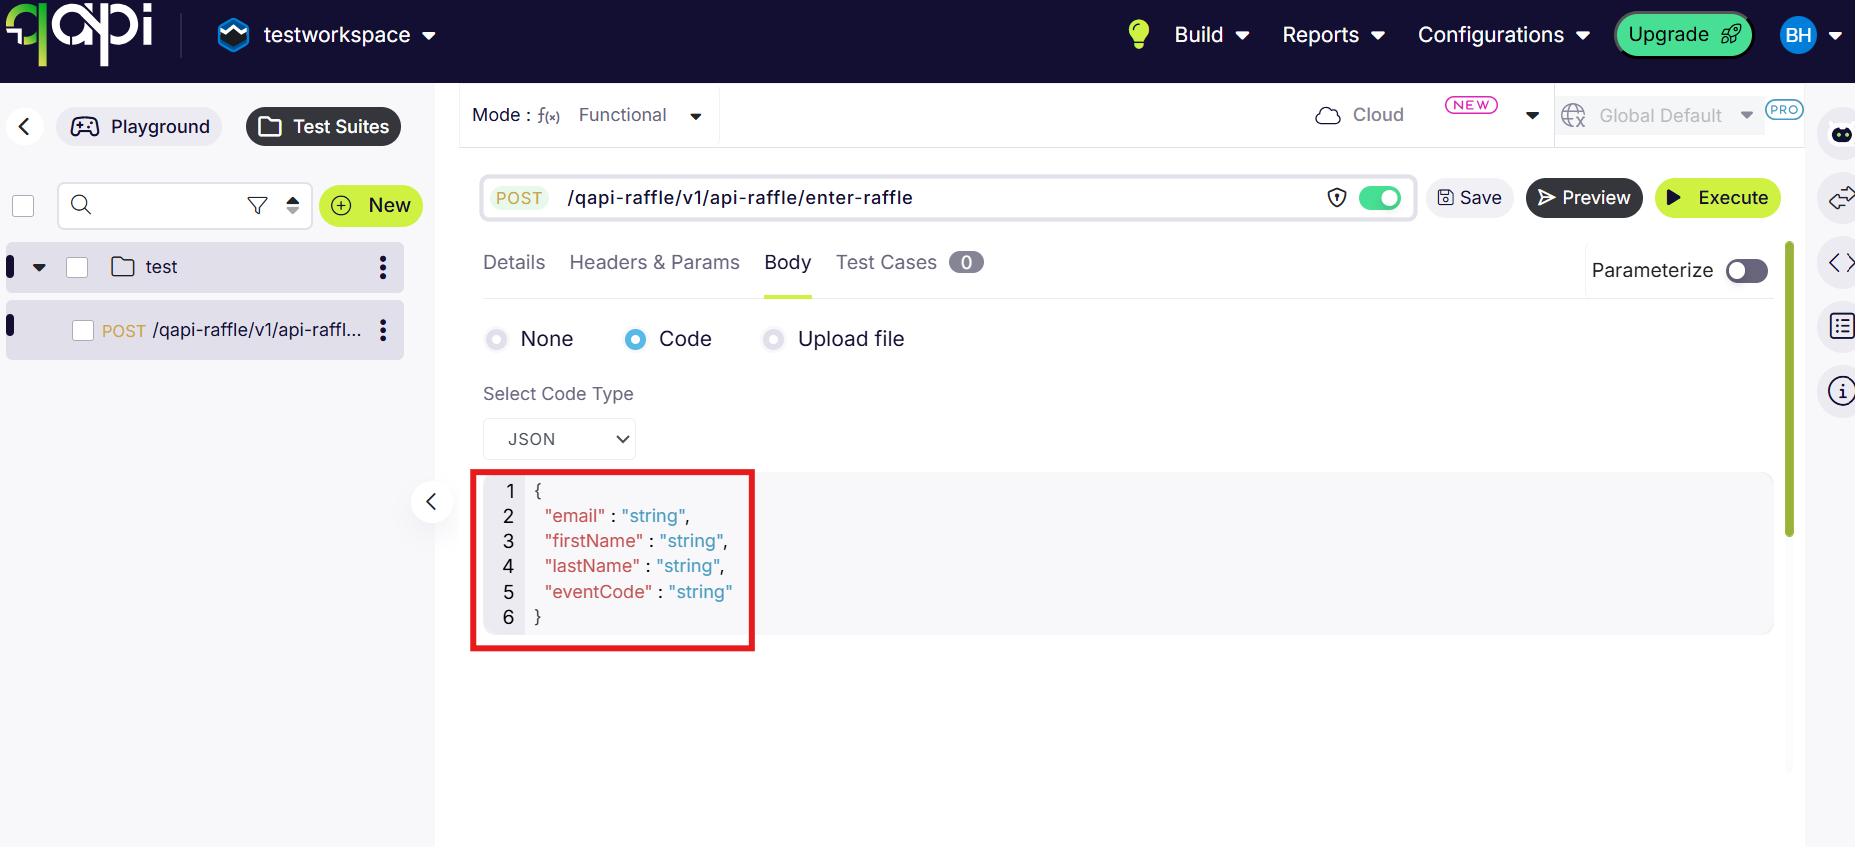
9. Enter your email, first name, last name and the proper event code for
the raffle and then click the "Save" button.
10. Click the "Execute" button in the top right next to the
preview button with the default Cloud agent in order to submit your
entry into the raffle.
***Note: If qAPI returns any issues with the information you entered,
the error message will accurately describe what the issue is.***
How to manually recreate the qAPI Raffle endpoint.
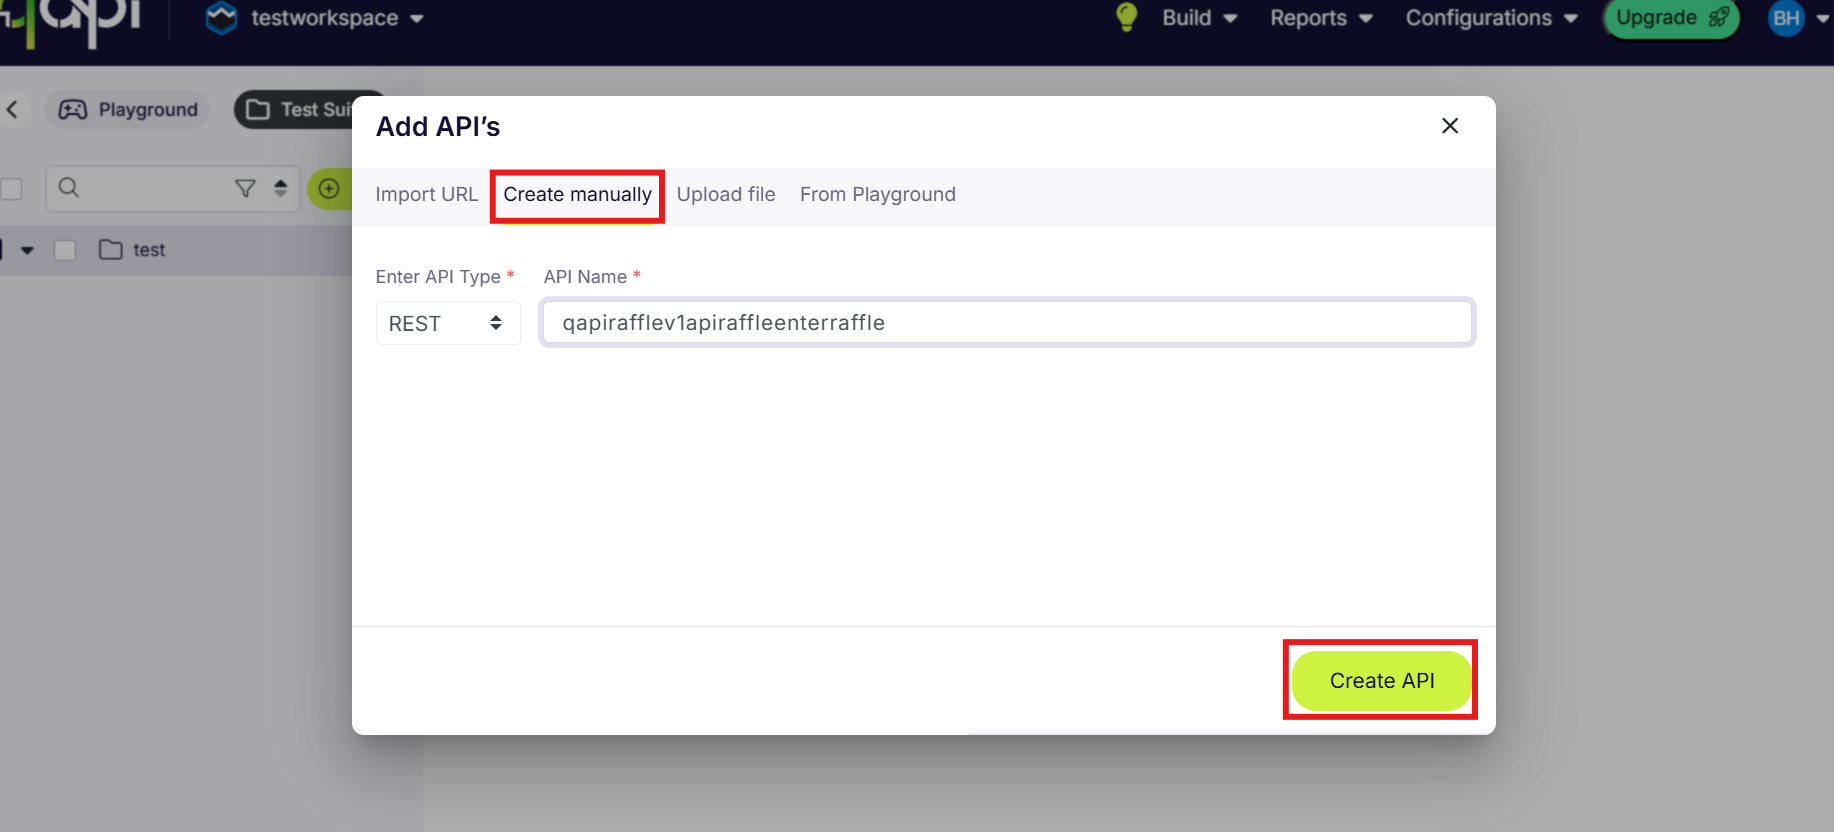
1. After following steps 1-5 in the above section, navigate to your
newly created test suite and click on the add API button.
2. Click on the "Create Manually" tab and enter a name for the
API.
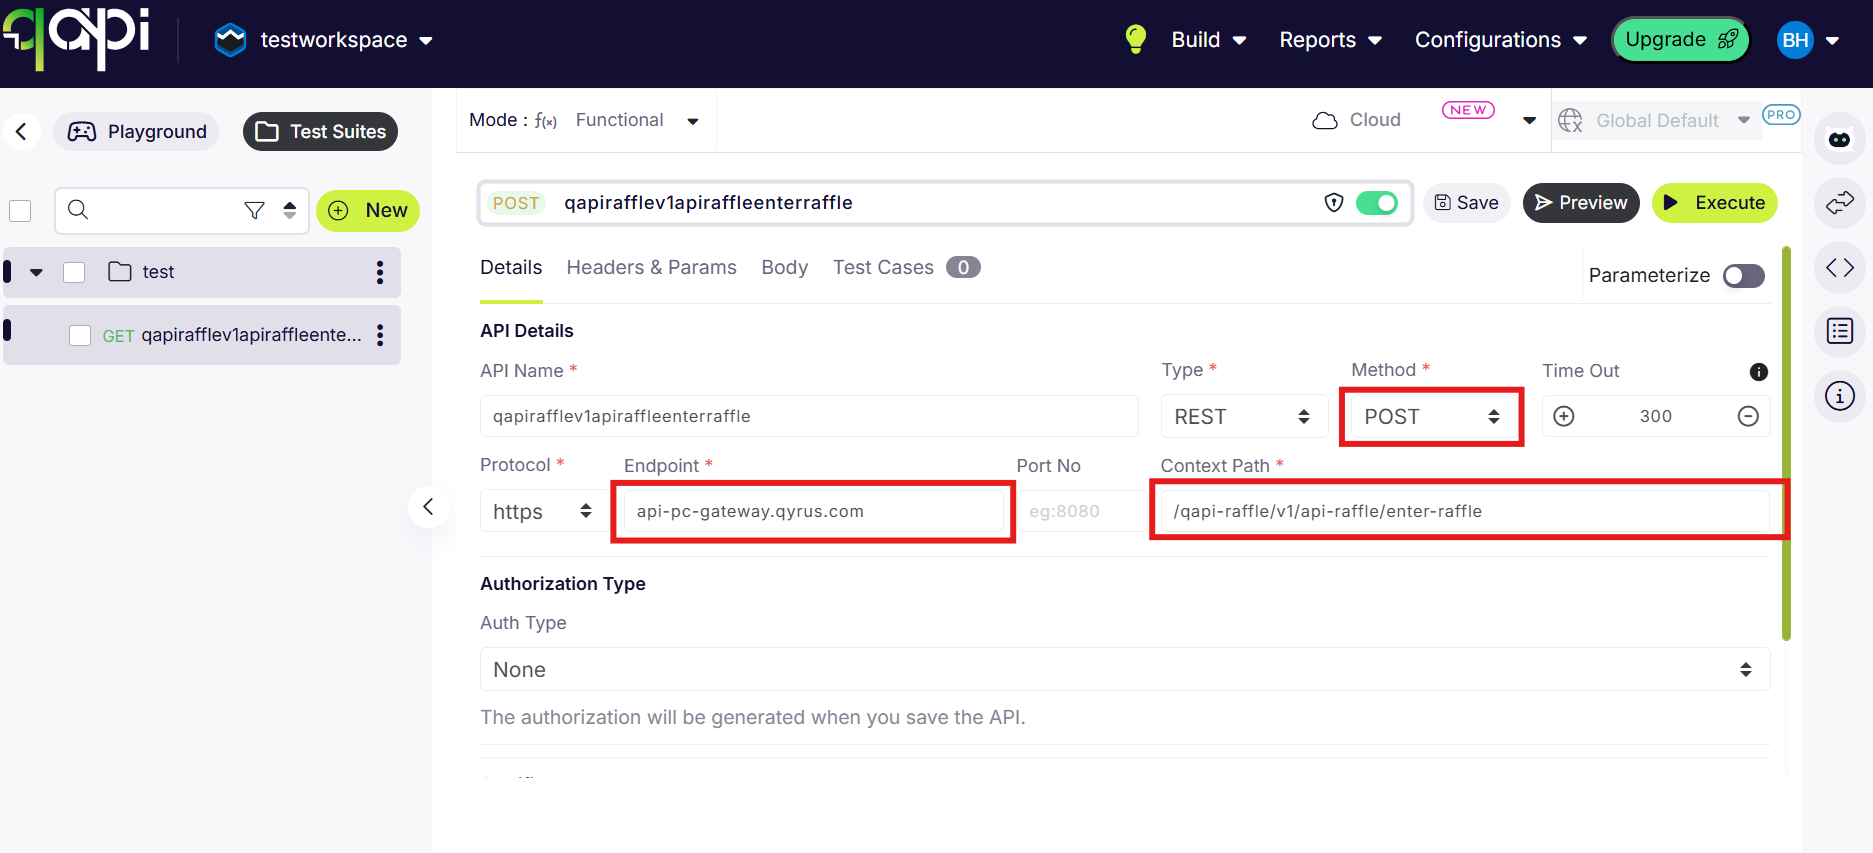
3.1 Enter "api-pc-gateway.qyrus.com" in the endpoint section
and then
3.2 Enter "/qapi-raffle/v1/api-raffle/enter-raffle" in the
Context Path
3.3 Change the Method type to POST
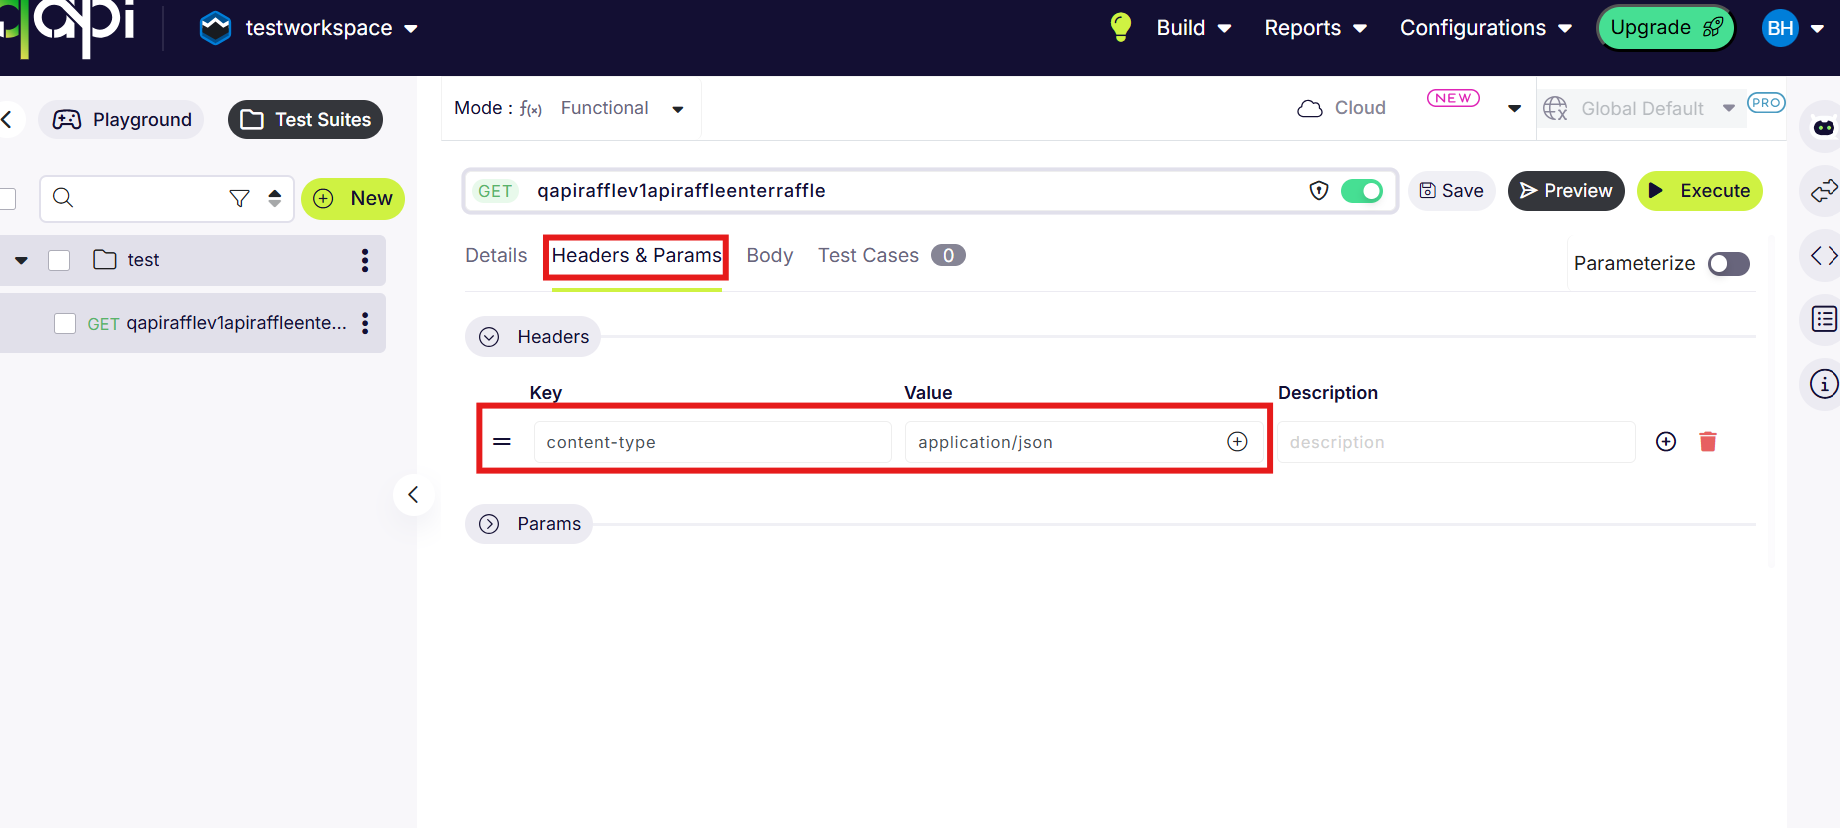
4. Go to the Headers & Params section, click the Headers dropdown
and add "content-type" as the header Key and
"application/json" as the value.
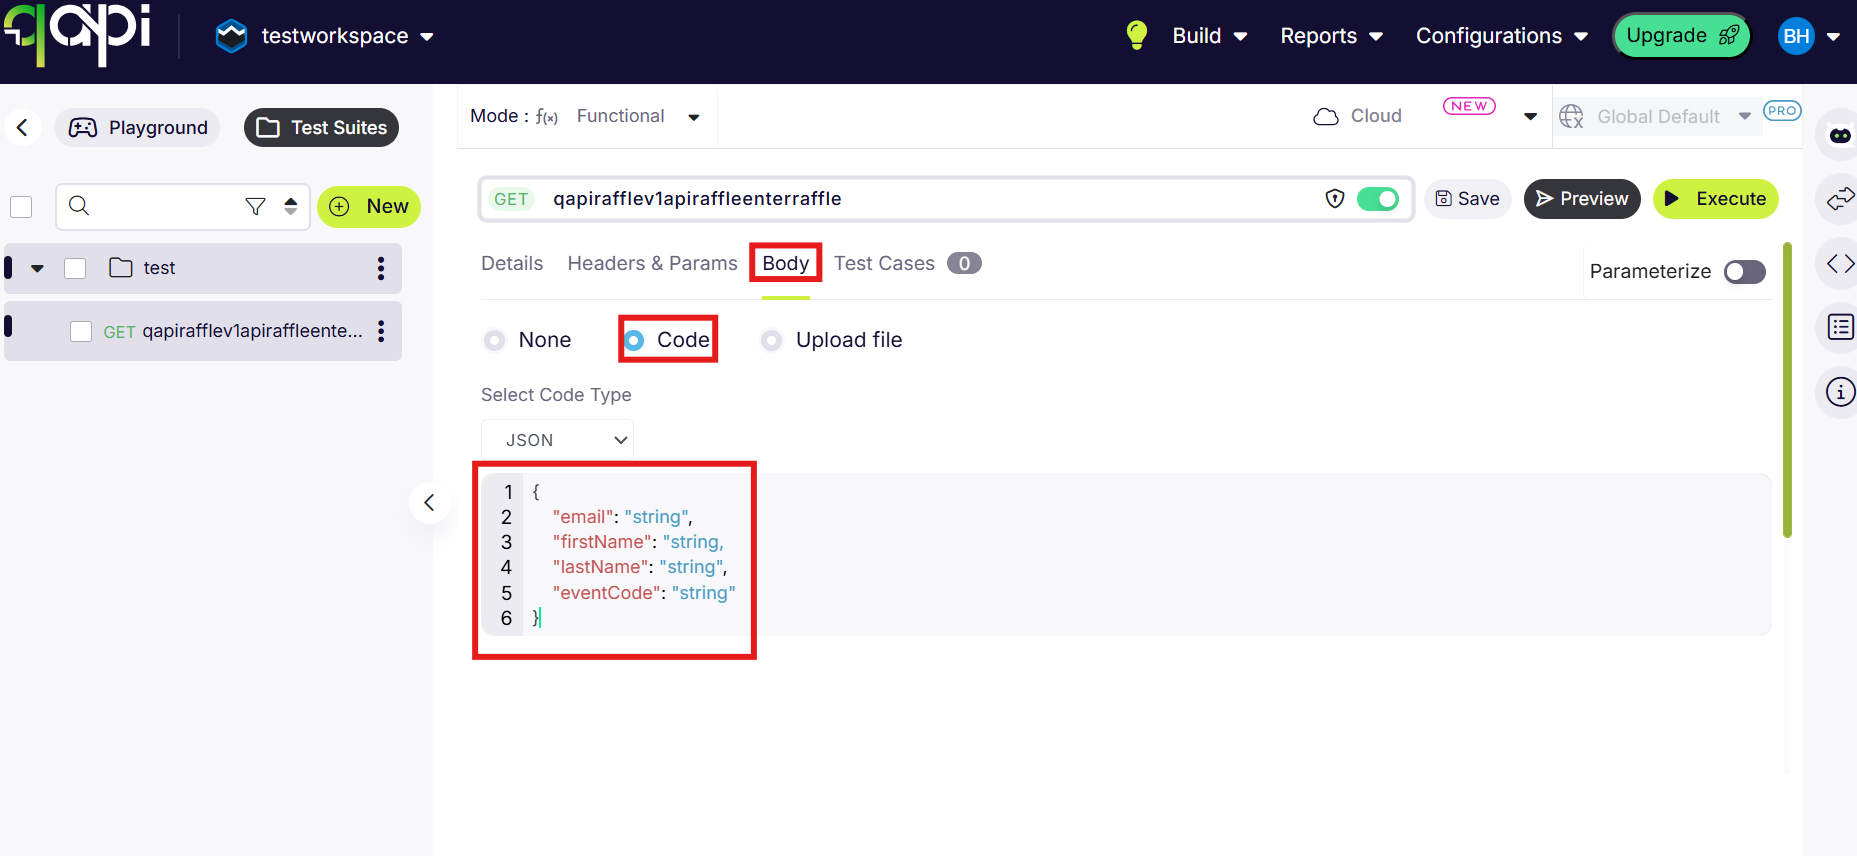
5. Navigate to the body section, select the "Code" option and
add these four fields into the body as a JSON with the appropriate
values:
email
firstName
lastName
eventCode
Then click the "Save" button.
6. Finally, enter the raffle by executing the API with the default Cloud
agent.
 ) in the "Import URL" tab with the Swagger option selected. OR Follow
the instructions
here to manually add the Raffle API using
the information provided in the JSON.
) in the "Import URL" tab with the Swagger option selected. OR Follow
the instructions
here to manually add the Raffle API using
the information provided in the JSON.